Friday, October 31, 2014

Christmas Tree in Black and White


Hello, Kitty!

"What fun to be a cat!"
                                                                               -------Christopher Morley

Hi, Friends.....


Here I am with my second post of the day and another entry in the Vandicrafts' Artistry Challenge - Black and White. This one has a Christmas theme.

I tried out my Core'dinations Chalk Core cardstock again with the Darice Christmas Tree embossing folder. I sanded it and then added clear glitter to the raised areas.  I also added some smoke gray and clear rhinestones. 


I embellished the corners of my tree panel with some fun little photo corners my friend, Karen Ladd, sent me with a ton of other fun stuff!!  (THANKS, Karen!!!)  And I even put little gems on them, too.


I embossed the greeting on vellum with the Darice Seasonal 3-Pack embossing folders.  Then I Versamarked my brayer heavily and rolled it repeatedly over the vellum so areas, besides the words, would be covered and echo the chalkboard effect, somewhat.  I heat embossed with that fabulous Wow! Opaque Bright White embossing powder.  I like the slightly grunge look that happened.  A few more gems and everything mounted on cardstock....and I was done.

Here's an angled shot.  The glitter still doesn't really show.....except, of course, for the stray bits that are clinging where they do not belong!!!  Ha!  (shrug....)


Hope you enjoyed my card.  It was fun trying out the black and white challenge!  Thank you, Melissa!!!

<3
Janis

Thank you for the honor of entering this card in the following challenges:
1.  Vandicrafts Artistry Challenge #14 - Black and White  
2.  Simon Says Stamp Wednesday Challenge #9 - Anything Goes  
3.  Word Art Wednesday Challenge #156 - Anything Goes  
4.  Shopping our Stash Challenge #175 - Rollin, Rollin, Rollin  -- Used my brayer
5.  The Paper Girls Challenge #66 - Anything Goes

Black and White -- Scripture card


Our Othello would never allow this....

"It is a difficult matter to gain the affection of a cat. He is a philosophical, methodical animal, tenacious of his own habits, fond of order and neatness, and disinclined to extravagant sentiment. He will be your friend, if he finds you worthy of friendship."
                                                                        ----------Theodore Gautier


Hi, Friends......

I am finally getting a chance to post a couple of cards today after a crazy week. Among other things, Little Peach has been sick for a couple days and might miss trick-or-treating tonight. :(

All week long I've been eyeing Melissa's Black and White Challenge on her wonderful Vandicrafts' Artistry Challenge page.  So I was delighted finally to get a chance to make something.


Making this card was a real challenge for me!!!  I haven't ever done anything in just black and white before.  But I got to try out several new products and a couple new techniques.  Yay!!  That's what I love so much about challenges. 

One new-to-me technique was sanding on some Core'dinations Chalk Core cardstock in white.  (THANKS, Core!).  I recently won a nice package from Core'dinations that included (among a bunch of other things..) this paper, a sanding block, and a specially treated Dust Buddy cloth that picks up all the sanding dust like a dream. [I actually already had a sanding block, so the one they sent me will be in my Christmas giveaway coming up in November.  :) ] 

I dry embossed the chalk cardstock with my new Darice Oblong Doily folder.  This was kind of cool because putting this cardstock in one way gave me a "white doily" when sanded (which I used for this card), but the other way gives me a black doily look!  I will make a card with that one soon sometime.  :)  


Oh, before I forget.............
Enabler alert:  Right now Joann.com has a bunch of their Darice emb folders (incl this one!) on sale for $2.00 each.  AND...they have their paper on sale for 50% off.   AND....they have FREE SHIPPING on orders $25 and over through Nov. 1. Ask me if I love Free S/H and 50% off sales....Oh, yessssssss I do!!  (Hey, I live 2 hrs from the nearest Joann's, so humor me!!)
I stamped this lovely Verve - New Mercies Scripture verse in the oval with Versamark and heat embossed with my brand-new Wow! Opaque Bright White embossing powder.  (THANKS, WOW!!)  LOVE LOVE LOVE this very bright white.  So glad I chose it as part of my prize from them.  It is much, much brighter than the white I had been using!!!  

After stamping, I noticed that I had been a wee bit too enthusiastic about sanding (it was thaaaaat fun!!) and a few words of my sentiment blended in too well.  I sponged very lightly with some Black Soot Distress Ink and cleaned off the embossed words with a baby wipe.  All fixed.  :)


Next, I tried another new technique for my flower.  I die cut vellum using Spellbinders Heartfelt Creations Majestic Blooms dies.  I tried a white flower with this, but it looked too bright.  I think the translucent vellum works perfectly with the chalkboard look.  I smeared carefully applied glue all over the flower after I put the layers together and covered it in clear glitter.  As it dried, I used a high-tech piece of equipment (an unbent paperclip) to lift and slightly curl each layer of petals, and then added a little clear rhinestone for the center.  Do you like it?  I really do!


Then all that was left was the bow at the bottom.  I got this deliciously decadent black velvet ribbon at a thrift store.  LOVE!!!  I think it's a perfect finishing touch.  

Other supplies include:  DCWV patterned paper, black Coredinations cardstock, Beacon 3-in-1 glue, and Tombow Aqua Mono liquid glue.

Hope you enjoyed my card.  Thanks for wading through my descriptions!  As always, I appreciate you visiting and leaving your wonderful comments!!!

<3
Janis

Thank you for the honor of entering this card in the following challenges:
1.  Vandicrafts Artistry Challenge #14 - Black and White 
2.  Simon Says Stamp Wednesday Challenge #9 - Anything Goes 

3.  Word Art Wednesday Challenge #156 - Anything Goes 
4.  DL.ART October Linky Challenge - Anything Goes
5.  The Paper Girls Challenge #66 - Anything Goes 

Thursday, October 23, 2014

Getting Spooked with Dreamweaver Stencils


Not into witches at all, but this made me...errr... laugh....  :o

"What intenseness of desire
In her upward eye of fire."
                                         ----------------William Wordsworth

Hi, Friends.......

I am here today with a ghostly Halloween card.  Since I am pretty tame when it comes to Halloween, this is about as spooky as you will see coming from me.  Ha.

I was super-inspired by the Smeared and Smudged 31 Days of Halloween extravaganza that Dreamweaver Stencils is participating in over at their Dream it Up! blog.  Did I mention they are having *daily* giveaways, too??  Yowza!!  Dreamweaver also is sponsoring a Happy Hallowthanksmas challenge this month, so I just had to unearth my autumn and Halloween DW stencils to see what I could make.
WARNING: If you are a stencil expert and especially if you are visiting here from Dreamweaver, you are going to be aghast at my terrible technique with this lovely stencil. I tend toward messy procedures with embossing powder and lack the amazing finesse I see on the Dream it Up! blog. Just giving you a heads-up, so don't say I didn't warn you!!! Eeeek!


For this card, I started with Coredinations rusty brown cardstock and my DW Fall Borders stencil. This particular stencil has two parts and they are probably supposed to be used separately, but I wasn't thinking about that and Versamarked all over the whole thing onto my cardstock.  

I did a sloppy job of it since I was only holding the stencil down with my fingers and my Versamark pad was very juicy!!!  Result:  oozing under the stencil.  (sigh)  Oh, well!  Out came my trusty copper embossing powder which I poured all over my gooped up cardstock and zapped it with my heat gun.  Yep, gooped up was right.  But it sort of had a cool look, too....all molten and coppery.


I wondered what it would look like if I Versamarked over the copper (gently this time) and added a different color of embossing powder.  So I replaced the stencil and holding it down with my fingers again, I put more of the Versamark on....not as sloppily as the first time.  Then I dusted it with black metallic embossing powder this time. After zapping it again, I got this shadowy effect which I really love!!!  
(That horrible screaming sound you hear is the lovely Lynell from Dreamweaver going into a hysterical fit over my awful technique!!! ARRRRGGGHHH!!!)


Next I took my Black Soot Distress Ink mini and inked all over the cardstock in haphazard fashion to enhance the shadowy look, wiping off the excess ink from the embossed portions with a baby wipe.  Funny thing......I had originally intended this to be merely an autumn card, but the specter of a Halloween card was rising from the darkness.  Yikes!!  I knew it needed a ghost.  Yes, a ghost coming from the gal who only does cutesy Halloween things!!  Eeek!!

I grabbed my Kiwi Lane Designs little ghost template from the Tiny Holiday Accessories set and cut out a vellum ghost.  The vellum spook was a little bit too white for these colors, so I sponged Antique Linen Distress Ink over the back of the vellum that would be next to the cardstock.  I like the pale beige a lot better.  

As you probably know, inks don't dry on vellum very fast.  Being the impatient crafter that I am Only having a limited amount of time for crafting, I went ahead and placed the moist ghost on the background.  It reacted with the black ink in a most ghoulish manner.....but perfect for this card.  I think the slight mottling makes the ghost look even more translucent and spooky.  I used a Sakura Glaze gel pen for the eyes.  Eeeek!!....even trying to do simple eyes free-hand gives me the willies!!    =:o

I finished off the card with a "fence" made from my Spellbinders Lace Doily Accents die set.  Don't you think this black DCWV paper makes a nice ornate iron fence border?  What I love about the fence is how it transformed a 2-D card into what looks like a 3-D scene.  I can see this ghost drifting down a path between the pumpkins on the left and the arbor on the right behind the fence.  What do you think?

Thanks for bearing with me during my lengthy description.  Even though this card changed directions on me a time or two, I really had fun making it and sharing the process with you.  I love how it turned out.

***********************************************
Ding Ding Ding:  New Follower Introduction Time!!!!!
***********************************************
Brenda "Disney Girl" of Disney Girl Crafts and other fun things!  is follower #63.  Hooray!!!!  Brenda has a lifelong love of all things Disney and her blog is like going to Disneyland!!  You will definitely have a smile on your face after seeing her adorable and fun projects!!!  She also is on the DT for Scrapbook Blessings Club 
where she saw one of my projects.  Thanks so much, Brenda, for becoming a follower!!  I appreciate your support and encouragement!  This ginormous smile is all yours:
 :)))))))))))))))))))))))))))))))))))

Thank you to everyone for visiting and commenting. I hope your day is beautiful, even if the weather outside is blustery like it is here!  

<3
Janis

Thank you for the honor of entering this card in the following challenges:
1. Dreamweaver Stencils Happy Hallowthankmas October Challenge

Wednesday, October 22, 2014

Halloween Bat Shaker Card


"The mathematical probability of a common cat doing exactly as it pleases is the one scientific absolute in the world."

                                                                     -----------Lynn M. Osband


Hi, Friends.....

I am here with a fun Halloween shaker card. I made this awhile ago and thought I'd better get it posted before I have to wait until next year!!! EEEEK!!


I absolutely adore bats.  They are my favorite Halloween motif along with pumpkins.  I picked up this sweet little bat from the dollar rack at JoAnn's and heat embossed it up with a Serendipity trick-or-treat bag stamp.

I used a variety of dies for this card:  Sizzix Scalloped Circles, Sizzix Fancy Labels, and Spellbiinders Heartfelt Creations Raindrops on Roses.  I like the scroll work of the black die cut against the orange.....gives it a bit of a gothic feel, I think.  I used some corner scissors for the black background panel. 


In the above photo, you can see my sweet little bat swooping in to go trick-or-treating a bit better.  I wasn't sure if the sequins would hang up on the scrollwork background, so I lined it with an additional piece of my ancient acetate that's been in my stash for years!  That way the sequins are actually between two sheets of smooth acetate.  Other supplies I used include:  DCWV cardstocks and paper, orange Coredinations cardstock base. 

TIP:  When I heat embossed my bat image, I didn't get as complete of coverage as I wanted for a nice solid black bat.  A black Sharpie marker came to the rescue.  I just colored in the parts where needed.  Even in the closeup, I don't think you can tell I fudged a little.

Hope you like my cute-style Halloween card.  I have a spookier one coming up soon.......so waaaaaaatch out!  Boo!!

<3
Janis

Thank you for the honor of entering this card in the following challenges:
1.  Craft Spot by Kimberly Challenge #155 - Too Cute to Spook
2.  DL.ART October Linky Challenge - Anything Goes
3.  Scrapbook Blessings Club Challenge #32 - Anything Goes Shaker Cards
4.  Sweet Stamp Challenge Blog - Halloween
5.  Fussy and Fancy Challenge #25 - Orange and Black

Tuesday, October 21, 2014

Upcycled Gift Box


"A little drowsing cat is an image of perfect beatitude"
--------Jules Champfleury


Hi, Friends....

I'm back with a little upcycled acetate box I made especially for the the Add a Little Dazzle Wrap it Up challenge. I had this clear box (used to hold some foam sticky letters) sitting around and couldn't bear to toss it because I wanted to decorate it. This was the perfect opportunity!

On the front you can see where I embossed some snowflakes into the gorgeous blue Add a Little dazzle metal sheet. I also punched out some small snowflakes and put them on the bag with the silver backside showing, instead of the blue.


I wanted the outside of the box to be free of any embellishments that could get rubbed or knocked off, so I attached my decorated panels inside the box. 

I used Echo Park Winter Wishes for each panel and made them slightly smaller than the actual side of the box so the wrapping tissue inside can show a tiny bit.  Seemed more festive to me.

I used white Add a Little Dazzle for the snowflakes on this side and little stick-on rhinestones.


After getting my panels all made, I then wondered what adhesive would work to attach these to the smooth acetate surface.  The one I had planned to use wasn't staying stuck.  

I knew I would have to go to Beacon 3-in-1....but there was a problem:  B3-1 is acetone based and I was pretty sure it would eat the plastic.  I needed something to coat the plastic to provide a barrier.  So I went to my old standby for decorating all things Christmas...... glitter glue!!!


I smeared carefully applied a thin coat around the edges where I would be adhering the panels to the sides and let it dry.  Then I was able to use my Beacon 3-in-1 with impunity.  Yay!!  

Some of the glitter glue oozed around onto the panels, but that just added more sparkle and I like it, anyway.

I topped off the gift box with a strap of May Arts wired ribbon.  Love this sheer, shimmery blue!!!


Hope you have enjoyed the little tour of my upcycled gift box. It was a lot of fun to make and I hope the recipient enjoys it, too.

<3
Janis


Thank you for the honor of entering this project in the following challenges:
1.  Add a Little Dazzle Challenge #47 - Wrap it Up!
2.  Simon Says Stamp - Monday Challenge - Anything Goes 
3.  Tando Creative Challenges - October - Cold as Ice 
4.  Word Art Wednesday Challenge #154 - Anything Goes
5.  DL.ART October Linky Challenge

Tuesday, October 14, 2014

Lily of the Valley


 "A meow massages the heart."
-------Stuart McMillan
 
Hi, Friends....

I am back with a simple little card I made for the MFP Color Challenge - Peach, Yellow and Green.  I used one of what I call my "card starters".  I have a stack of partially made cards that have one or two scraps of patterned paper or cardstock already on them.  These are all ready for the fast addition of an image and/or sentiment and small embellishment.  

I just happened to have one with this beige cardstock and some peach paper that I had run through a crimper with a subtle star pattern on it.  Yay!  

I stamped the MFP Lily of the Valley image from the set of that same name in Memento London Fog ink on watercolor paper and painted it with my watercolors.  I wanted to put a gray wash around the image so the white flowers would show, but I am afraid that gray didn't turn out as well as I wanted.  I will keep practicing.  :)

I put a bit a yellow paint in the middles of the individual flowers, but it didn't show up too well.  I wanted more yellow for the challenge, anyway, so I used my yellow Sakura Glaze gel pen to make the centers more visible.  Then I also added the little yellow rhinestones.  Somehow, the flowers still weren't quite right, so I also added a bit of glitter gel pen to the centers.  I like how they turned out.  The sparkle echoes the little rhinestones...or is it the other way around???  Hopefully, you can see the shine in this angled photo.


Hope you liked this simple little card.  Do you do "card starters" similar to what I described?  What other things help you save time and use scraps????  Please tell me in your comments!

Have a lovely rest of the week!!!
 
<3
Janis

Thank you for the honor of entering this card in the following challenges:
1.  Vandicrafts Artistry Challenge #12 - Anything Goes
2.  MFP Speedy TV Color Challenge #40 - Peach, Yellow, and Green
3.  Simon Says Stamp Wednesday Challenge - Use Watercolors
4.  DL.ART October Linky Challenge - Anything Goes
5.  Hiding in my Craft Room Challenge #169 - Super Scraps Saturday - Use Scraps

Saturday, October 11, 2014

My Best Shot


"The real measure of a day's heat [or how warm you have the house!] is the length of a sleeping cat."
                                                                              -----------Charles J. Brady [and me!]

Hi, Friends............

I did it!!!  

With this card, I managed an entry in all SEVEN, count 'em seven, of the Winnie & Walter WCMD Week of Challenges!!!!  I am really pleased.  There is no extra prize or anything for doing all seven challenges, but I just wanted to.  :)

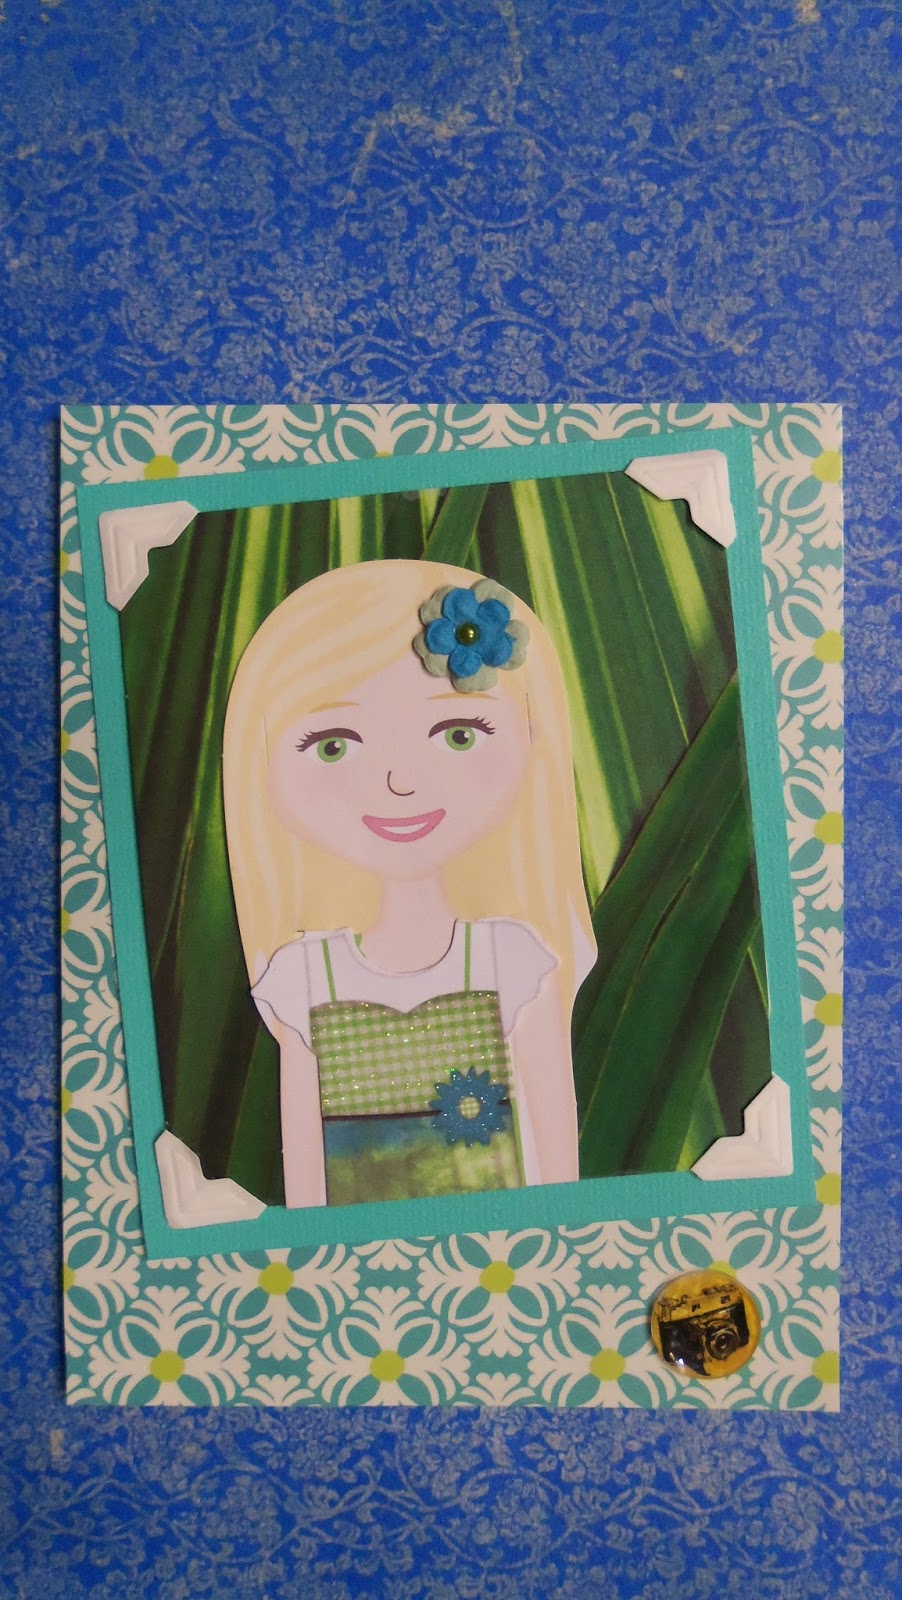
This last one was the On Trend with Lea challenge which was a puzzle for me because it asked you to make a card with the trendy camera theme.  I am not a camera bug and don't have any camera stamps or papers, so I didn't think I could finish out the challenges.  But I searched and searched through my stash and finally found this little Glitz camera rhinestone button:


That's not a very good picture of it, but it is what I based my entire card around.  

The only thing I could think of for this card was to make a faux photograph and use the shiny camera piece.  So out came a stack I didn't figure I personally would ever use, but that eventually my granddaughter would:  the DCWV All Dolled Up Stack that has paper dolls and accessories in it.  


So, I chose one of the gals in the stack and put a little tropical-looking outfit on her and a Prima flower in her hair.  Then I found a palm tree looking background from the DCWV Premium Photo Stack and "snapped" a vacation shot.  :)  


I mounted the photo with Scrapbook Adhesives white photo corners and put her on a background of exotic paper.  The camera in the corner was all that was needed for additional embellishment.  

So....what do you think?  I will probably use this for a young teenage gal at some point....turn it into a birthday card, perhaps.  I think it will work.  

This challenge was a stretchhhhhhhhhhhh for me, but I gave it my best shot and ended up having fun with it...even though I was rushed here at the end.  A big THANK YOU to Winnie & Walter for the tremendously fun time I had entering ALL SEVEN of your WCMD challenges!  (Whew!!)  I am so grateful you kept your challenges open for the whole week!! 

<3
Janis

Thank you for the honor of entering this card in the following challenges:
1.  Winnie & Walter WCMD 2014 On Trend with Lea - Camera Theme 
2.  Vandicrafts Artistry Challenge #12 - Anything Goes
3.  Crafty Hazelnut's Patterned Paper Challenge - October 

Time for Tea


Do you think perhaps their proofreaders are blind, too?????  :)

"The cat sees through shut lids."
-----------English saying

Hi, Friends....

I was able to make one more card for the Winnie & Walter WCMD Week of Challenges!!  This one is for the Sketched with Julie challenge

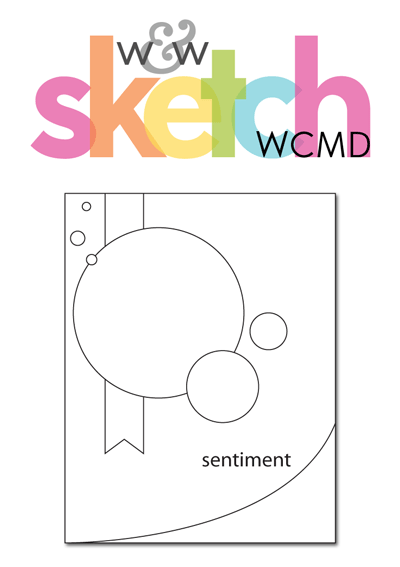
Here's the fun sketch she gave us:


I just couldn't get a handle on the sketch until I hit on using a doily for the large circle and some adorable Mary Engelbreit stickers a friend gave me (Thanks, Christy!!!).  My doily isn't quite big enough to cover as much of the card as the sketch has, but I hope it will be okay.

My doily seemed like it needed a bit of definition against the peachy background (looks orange, but is really peach! heehee) so I heat embossed some gold circles from the Winnie & Walter - Scenery:  Big Bang Confetti stamp set to add a bit of filigree to it.  

Other supplies include:  DCWV premade card base, K&Co green patterned paper, Zva crystals, Want2Scrap adhesive pearls, and thrift store yellow ribbon.  That ribbon gives me fits when I am using it on my cards so I used my Xyron 1" sticker maker.  Worked like a charm!

It was fun using stickers on my card today.  I don't do that very often, but these tea ones seemed to go well with the doily idea.  Thanks for stopping in!!  Wish we could enjoy a cup together in real life.  :)

<3
Janis

Thank you for the honor of entering this card in the following challenges:
1.  Winnie & Walter WCMD 2014 Sketched with Julie 

2.  MFP Speedy TV Color Challenge #40 - Peach, Yellow, Green
3.  Vandicrafts Artistry Challenge #12 - Anything Goes


Peach, Yellow, and Green


These two cats look sooooooo much like my Chaienne and Aliyah.....except my old lady cats are arched-up rivals.  I've never in their 13 years seen them sit civilly that close to each other.  They define the word "catty". 

"If I called her, she would pretend not to hear, but would come a few moments later when it could appear that she had thought of doing so first."
                                                                                -----------Arthur Weigall


Hi, Friends.....

I am back with another card to squeak in before the deadline at Winnie & Walter's WCMD Challenges.   I still have until tonight, so who knows....I might even get another card in!  :)  

This one is for the Pinspiration with Vanessa challenge.  I was so glad to be able to use my Winnie & Walter - Scenery:  Big Bang Confetti stamp set.  I think it works fantastic embossed in white for this card, don't you? I also used a sentiment from Mark's Finest Paper - Works of Art set, which I heat embossed in a metallic green.  Yum!  I will enter this in the MFP Color Challenge - peach, yellow, and green.


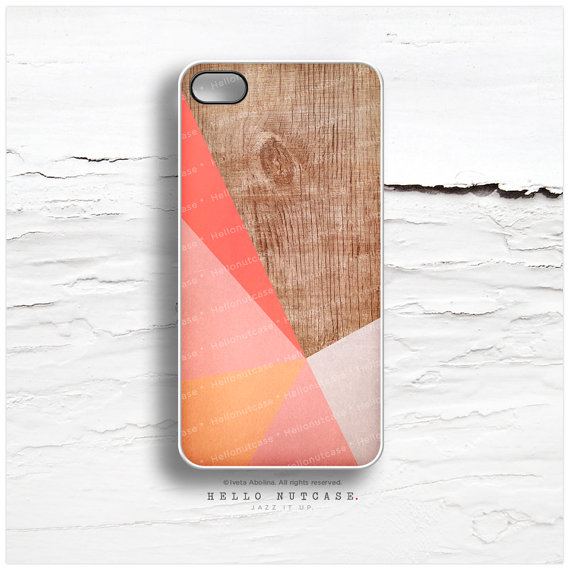
Here's the Pinspiration inspiration piece for the W&W challenge.  I love the colored panels and drew inspiration from those for my card. 

I used a DCWV peach card base and pieced the solid pastel green and yellow panels over it.  Easy peasy!!!  It's only cut and paste....but I liiiiiiiiiiiike it!  :)    Hope you like it, too!


****************************************************
Ding!  Ding! Ding!  It's New Follower Introduction time!!!!!
****************************************************
Please help me welcome my newest follower #62
Creations by Shirl -- Shirl lives way over in Hawaii, but I didn't see any swaying palm trees on her blog.  What I did see were Shirl's cards with images so sweetly colored that your heart just squeezes itself into a happy pitter-patter.  She also has exotic pets.....turtles and sharks!!!.....in her house!!!  I loved perusing her blog, enjoying her artistic creations and getting introduced to those interesting house pets. I think you will, too!!!  THANKS, Shirl, for becoming a follower.  Your support is a great encouragement to me.  This ginormous smile is for you!

:)))))))))))))))))))))))))))))


Okay, friends...that's all for now. Hope you are having a lovely weekend. We're getting a rainstorm currently, but we have had some gorgeous autumn days, lately.

<3
Janis

Friday, October 10, 2014

Imperfections.....Make us Real

 
This reminds me of when Little Peach tells Grandpa that he doesn't have any hair.  He does, actually, have (some) hair ........ but it is short.  :)


"There is no pretense of sympathy about the cat.  He lives alone, aloft, sublime, in a wise passiveness."                                                                              
                                                                            -----------Andrew Lang

Hi, Friends.....

Back again with another entry for the Winnie & Walter WCMD Challenges.  This one is for the Pattern Play with Shay challenge.  You might recognize my background, from a couple posts ago when I detailed how I made it.


I love the Henna pattern of this Darice embossing folder.  It just seems to go perfectly with the autumn colors of my Distress Inks.  These inks are still visible and peeking out a bit, but blend pretty well under the heat embossing.  You'd sure be able to tell the difference if they weren't there, though!  

I used a new Unity stamp for the sentiment (Thanks, Unity!) and then went to work on a leaf I punched out of a metal sheet from Add a Little Dazzle.

You all know how I LOOOOOOOVE gleaming gold....and all things shiny and sparkly, right?  Well, I decided to embellish my leaf a bit.  First off, I used my ball end stylus to draw in veins.  Then I heat-embossed with bronze, copper, and gold till I got the desired effect.  Note:  Be sure to use a clothespin or something to hold on to your metal when heat-embossing.  I had some hemostats (from vet hubby!) and they worked perfectly.  


I love how even with all the layers of metallic embossing powder, the veins are still showing, but the surface has a smooth molten look.  You can see the gleam in the angled picture above.  The Add a Little Dazzle metal is super-fun to use and I love how I was able to bend and roll the edges of the leaf slightly for more dimension without adding bulk. 

Hope you've enjoyed seeing the finished product from the "before" post.  I appreciate your visit and your comments!  You make this bright autumn day we've had be even brighter!!

<3
Janis

Thank you for the honor of entering the card in the following challenges:
1.  Winnie & Walter WCMD Challenge - Pattern Play with Shay 
2.  Unity Stamp Co. Friends With Flair
3.  MFP Speedy TV - Simple Salutations Challenge #115 - Use Metal   
4.  Simon Says Stamp Wednesday Challenge - Use Watercolors 
5.  Add a Little Dazzle Dazzling Diva Challenge #46 - Fall is Here or Anything Goes
6.  Cards in Envy - Autumn Leaves - must be A2 Card size and flat for mailing.

For a Friend...

(Another sign might be forgetting the difference between your and you're!) 


"The cat goes out
And the cat comes back 
And no one can follow 
Upon her track.
She know where she's going,
She knows were she's been,
And all we can do
is to let her in.

---------- Marchette Chute

Hi, Friends......

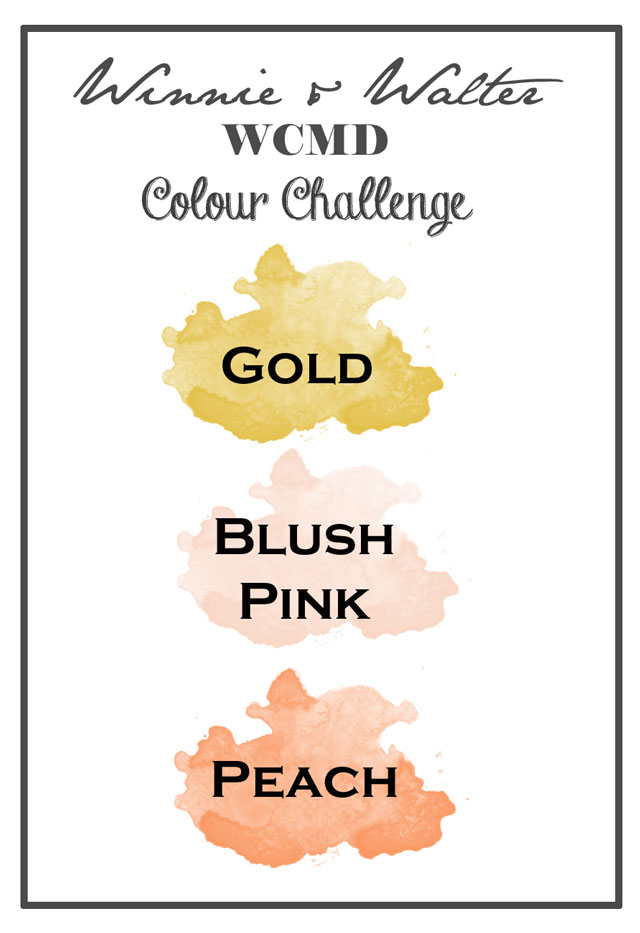
I am back with another card for one of the many wonderful Winnie & Walter WCMD Challenges that are still going on over there. They do not close until Saturday evening, so there is still time for you to join in, too!!  (Did I mention there are fabulous prizes???)  This card is for the color challenge hostessed by Gayatri.  Here's the lovely color palette she chose:


Can Janis resist anything that has gold in it????  Not a chance!  And, gold with pink????  Oh, be still, my beating heart!!   :)


For this card I chose another of my reject extra backgrounds, as detailed in my last post.  This background started out as plain extra-thick white cardstock.  I inked up my Darice - Fall Leaf Background folder with several Distress Inks:  Worn Lipstick, Spiced Marmalade, Fired Brick and ran the piece through my Big Shot.  For this background I wanted even more texture, so I Versamarked over the textured design and heat embossed it with gold.....over and over and over. 

 
The more layers of gold embossing powder you put on it, the higher it builds up on the ridges of the embossing and the more chunky it looks.  It also partially fills in the valleys of your textured piece to give a rough, vintage appearance.  I LOVE this look!!  Also, love that it still lets my Distress Ink colors show through. 


I also gold heat-embossed a brand-new Inky Antics Script Sentiments #1 stamp I recently won (THANKS, Inky Antics!!).  Isn't that font just gorgeous??  Then I punched some fall leaves out of my brand-new Add a Little Dazzle metal sheets I won (THANKS, AALD!!!).  A Prima flower with sequin center and a gold leaf from some ribbon in my stash finished off the focal panel.  I matted it with DCWV pink cardstock and put it on a premade DCVW Glitter card base.  I am totally in love!!!!

Hope you have enjoyed this card, too.  Thanks so much for stopping by.  I LOVE reading your comments.  They mean more to me than you can imagine!!!  

<3
Janis

Thank you for the honor of entering this card in the following challenges (oooh...lots of them!):
1.  Winnie & Walter WCMD 2014 Challenge - Colour Combo 

2 . MFP Speedy TV - Simple Salutations Challenge #115 - Use Metal
3.  Simon Says Stamp Wednesday Challenge - Use Watercolors
4.  Add a Little Dazzle Dazzling Diva Challenge #46 - Fall is Here or Anything Goes
5.  Word Art Wednesday Challenge #153 - Anything Goes
6.  Eclectic Ellapu - Purple Team - Texture Paste/Embossing  
7.  Double Click Connections - Use Pink
8.  Cards in Envy - Autumn Leaves - must be A2 Card size and flat for mailing.