Hello, Friends....
Thank you to everyone who has visited my blog yesterday and today. I really appreciate it!! This is all so very new to me. I appreciate each one of the kind comments. I am also full of questions, so I might be contacting some of the bloggers who have been sweet enough to stop by!
Tonight I finished up a baby girl gift and made a card for an expectant mommy. I went with very delicate colors and so, of course, it doesn't photograph well. But this is part of my learning curve!!! Here's the card I made:

I dug out an ancient set of Inkadinkadoo Dreamsicle stamps that have been in my stash for years and I had never used!!!

With these precious images, I had the idea of stamping them on vellum and heat embossing with white embossing powder. I wanted soft colors so I pulled out my cheapo plastic palette and used
Gelatos of the desired hues. I scribbled the Gelatos in individual wells and misted a bit of water in the larger center well of the palette to wet my brush.
I turned my embossed piece of vellum over and painted the
backside of it so the colors showing through the front would be subtle and dreamy. These are the Gelato colors I used: skin - peach, wings - a very pale wash of Earl Grey, large rose in hair and some of smaller flowers - bubble gum. For the other parts I painted, I actually used some inexpensive children's watercolors we've had around since the kids were small! I guess this was my project to employ some really old supplies. :)
I love how delicate the colors turned out!!! I traced the inner circle of a 4" round doily on vellum (Corrie, I am finding these doilies indispensable!!) and cut it out so it would fit inside the doily frame. With the heat embossing and the watercoloring, the vellum wasn't lying as flat as I wished, so I got out my
Xyron 3" Sticker Maker that I won from Xyron. THANK YOU!!! It was a breeze to turn my vellum image into a sticker that would adhere smoothly to the doily. You can see that it still buckles a bit, but I am satisfied with it.
I mounted my doily frame and image on some
DCWV Butterfly Garden patterned cardstock (that I had pre-folded and edged with some scallop scissors) with
TomBow Aqua Mono Liquid Glue. I like this clear glue for items that are lacy or lattice-like. It dries clear and doesn't stay sticky in between the narrow parts of the doily design.
Next, I wanted the wings to shine and sparkle a little more, so on the mounted image I colored them in between the lines of embossing with my
Sakura Gelly Roll Stardust Clear pen. It gave just the right amount of sparkliness. I don't know if you can see it in this angled picture or not.
Next I added the pink bow at the top upper left, but wanted a little something at the lower right for balance. I didn't want something very big or conspicuous that would overwhelm the softly colored image, so I opted for one of the lovely
Prima Fabric Fancies opal flowers that
Sabrina Alery sent me as part of a humongous prize. (THANKS, Sabrina! I have reached for these flowers over and over!!!) I wanted something special for the flower center, so I dug out some absolutely gorgeous pearlescent
Mill Hill glass seed beads I had found at a thrift store.
I put a couple of
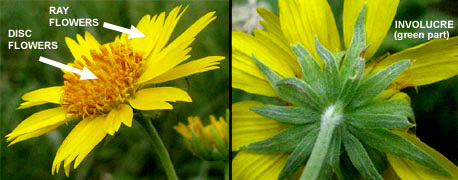
Micro sized Glue Dots side by side, overlapping slightly, in the center of the flower and carefully opened the bead package without sending them flying all over (this time). The package actually says to "Please open carefully"! :) I placed one bead in the very middle and clustered the others around it with the holes showing like stamens....sort of. (Ha! My old biology prof would remind me that what they really look like are the
disk flowers in the middle of a composite flower. And he would be right!!)

I think that about covers it. I love how this turned out. I am delighted with the very delicate colors that painting on the back side of the vellum gave me.
Would you like to see what I made for the baby, too?????
A set of three flannel receiving blankets:
Isn't that ladybug flannel the cutest???? Love it. I also really love that crazy-bright tie-dye one in the middle. I am wild about all the gorgeous flannel prints I can find at JoAnn's for making receiving blankets. This has become my baby gift of choice for all my young friends when they are expecting. All I do is buy a yard each of three patterns of coordinating flannel, pre-shrink it, cut the edges even, and finish the edges. The way I finish the edges is to zig-zag around the entire blanket, then fold under and straight-stitch all sides, then fold under once again and straight-stitch all sides. For extra insurance, I apply Fray-Check to the corners to make sure the stitching doesn't give way there. Tie it with a coordinating bow. All done. :)
Wow.....this was a LONG post!! Congratulations if you made it all the way through!
Thanks for stopping by. I would love to hear what you think about my projects and would appreciate any helpful hints!!!
<3
Janis