Chaienne

Chaienne

Saturday, January 16, 2016

Cat with Sneakers - Thank You!


One of my all-time fave Kliban Cat images.  :)

Hi, Friends.......

I am here with a really fun card for Ike's SUYP Cats Only Challenge this month with the theme of "Furrything Goes".  :)  If you haven't visited her SUYP blog, you are in for a treat.  Ike not only has fabulous cards, but challenge posts that make you smile as well as give you a place to sharpen your claws....skills!  

One fabulous part of the SUYP Cats Only Challenge Blog is Ike's wonderful FUR-EEEBIE, featured monthly.  She generously shares a kitty digi she designed each month.  This month I absolutely loved the crazy dancing cat she was offering, but wished so much the kitty had sneakers on because of a particular card I wanted to make.  No sooner said....than done!  Next thing I knew...I had a notification that the same kitty was now ready with sneakers.  THANK YOU, IKE!!!


Isn't that digi by Ike just so wacky and wonderful????  I LOVE IT!!  

The reason I wanted a kitty with sneakers is because a friend recently passed some tennis shoes to me that weren't right for her.  They were used, but still in fantastic shape for me!  I was so delighted that I wanted to make her a special thank you card.  

I wanted the colors of the shoes to really stand out, so I printed the digi onto kraft and used Sakura Gelly Roll Moonlight Gel Pens for them. I used subdued, but shimmery, colors of gel pens for the rest of the kitty, except the facial features and toe pads. I wrote in "Image by IKESART.com" as a special acknowledgement of Ike's wonderful gift of this wonderful image.

Other supplies used: Distress Ink - Walnut Stain, card base made from DCWV paper, Sizzix - Circles, Scallop die cut, ribbon and sentiment stamp from my stash.

Hope you enjoyed my card today.  I don't know if I have ever posted a card that I colored with gel pens before.....but I need to do this more often before the zillion-piece set of them that I got for Christmas last year...2014!....dries up!!  Eeek!  (For the record, I have never had my Sakura ones dry up, but I am not sure how long this big set of Brand X pens will last!)

Cat lovers, be sure to check out the SUYP Cats Only Challenge for tons of furry fun!!! See you there!!!

<3
Janis

Thank you for the honor of entering this card in the following challenges:
1. SUYP Cats Only Challenge
2. DL.Art Thankful Thursday #172 - Penguins or Black, White, Yellow / alt Thank You
3. Dragonfly Journeys Challenge #39 - You Crack Me Up :)
4. Word Art Wednesday Challenge #217 - Anything Goes Family Friendly
5. DL.ART January Linky Challenge - Anything Goes

6. Ike's World Challenge #54 - New Beginnings (Do new-to-me sneakers count?)

Friday, January 15, 2016

Pain in the Neck - Get Well Soon!


Hi, Friends......

I am here with my third (and, I think, final) entry for the Mark's Finest Papers Speedy Fox and Friends technique challenge - Acrylic Block Stamping. If you missed my first and second entries, you can see them here and here.  I got super-inspired and made four backgrounds with this fun technique, but I think I will save my fourth one for later.


On this card, I used a 2-1/2" x 2-1/2" acrylic block....but when I inked it up initially, I only made a roundish smoosh in the middle of it with the ink...and then stamped with it on white cardstock using Distress Inks in Tea Dye and Scattered Straw.  Then I turned the block on its side and inked the narrow edge and stamped with it using Vintage Photo.  Then I decided I didn't like the white background, so I sponged an ombre look using Fossilized Amber, Scattered Straw, Spiced Marmalade, Ripe Persimmon, and Barn Door.  Now, this I liked!


I stamped the giraffe image from Mark's Finest Papers - Above the Rest stamp set with Versafine Vintage Sepia on a scrap of vellum and heat embossed with clear powder.  This piece was my second attempt.....since I messed my first one up!  Arrrgh...  The first vellum scrap had some irregular cuts in it which I cut around for an interesting curvy edge.  I liked that effect so well that I cut this perfectly straight-edged second vellum scrap with a curvy edge, too!  lol...

The sentiment is from the same MFP set and I stamped and heat embossed it the same way as the giraffe on a scrap of cardstock.  I added the burlap paper scrap and the bit of jute for some safari texture.

Simple stamped sentiment inside of card.
This turned out to be a really fun card to make with the ombre sponging.  I don't do that nearly often enough.  

Hope you enjoyed my three cards for the MFP Acrylic Block Stamping challenge.  Thanks for stopping by!!!

<3
Janis


Thank you for the honor of entering this card in the following challenges:
1. Mark's Finest Papers Speedy Fox and Friends technique challenge - Acrylic Block Stamping
2. Word Art Wednesday Challenge #217 - Anything Goes Family Friendly
3. DL.ART January Linky Challenge - Anything Goes
4. Craft Stamper TIMI January Challenge - Take a Stamp
5. House of Cards January Challenge - Embossing or Color Challenge
6. One Crazy Stamper January Challenge - Anything Goes
7. Dragonfly Journeys Challenge #39 - You Crack Me Up :)
8. Simon Says Stamp Wednesday Challenge - Ombre

Thursday, January 14, 2016

Get Well Soon - MFP Technique Challenge

Let me count the places..........  (ugh!)

Hi, Friends......

I am here with my second card for the Mark's Finest Papers Speedy Fox and Friends technique challenge - Acrylic Block Stamping.  If you missed my first entry, you can see it here.  


On this card, I stamped with my 7/8" x 2-1/2" acrylic block, inked with two different colors of Distress Ink:  Shabby Shutters and Spun Sugar.  Then I got adventuresome and heavily misted the stamped cardstock.  After the water soaked in, I (not-so-)dry embossed using my brand new Sizzix Textured Impressions - Roses folder.  The water diluted out the pink ink, but some of the green blocks are still visible in the card below.  I used some of the same colors to sponge on the rose embossing.


While the paper was still damp, I stamped the flower in the center using Mark's Finest Papers - Lily of the Valley stamp set and more Shabby Shutters Distress Ink.  I love the soft, dreamy, watercolor effects.

After the paper was dry, I rounded the corners and adhered it to my card base and stamped the sentiment from my Mark's Finest Papers - Above the Rest stamp set in Versafine Smokey Gray ink.  A bit of pink lacy thrift store ribbon finished it all off. 

Since this was a technique challenge, I felt free to do some experimenting around.  In hindsight, there are things I would have done differently with this particular card, but, all in all, I am satisfied.  My projects always are intended to help you explore different techniques and ideas right along with me.  My blog is more of a workshop than a showcase!  

Thanks for visiting and I hope you are getting ready to have a wonderful weekend!

<3
Janis


Thank you for the honor of entering this card in the following challenges:
1. Mark's Finest Papers Speedy Fox and Friends technique challenge - Acrylic Block Stamping
2. Word Art Wednesday Challenge #217 - Anything Goes Family Friendly
3. Little Scrap Pieces - Show it Off Saturday Linky Party
4. DL.ART January Linky Challenge - Anything Goes
5 Craft Stamper TIMI January Challenge - Take a Stamp
6. House of Cards January Challenge - Embossing or Color Challenge
7. One Crazy Stamper January Challenge - Anything Goes

Old and Cracked - Happy Birthday


Hi, Friends......

I got super-inspired today with the current Mark's Finest Papers Speedy Fox and Friends technique challenge - Acrylic Block Stamping.   Over at MFP they have a week-long technique challenge each month on the second Saturday with a tutorial they provide.  I love playing around with techniques, so these are a lot of fun for me.  :)  I ended up making 4 (count 'em...FOUR!) backgrounds, and have made 3 cards for the challenge so far.  Not sure if I'll get the last one made in time to enter or not, but I have it....just in case.  :)

This technique is very simple......but, as I was delighted to find out, there are all sorts of fun things you can do with it!  :)  In its most basic form, you simply ink up an acrylic block (I used Distress Ink) and use that as a stamp for a background.  Easy peasy.  


For my card, I used a 7/8" x 2-1/2" rectangular acrylic block with Distress Inks in Tumbled Glass and Shabby Shutters. I stamped them in a vertical column on the left side of my white cardstock.  

I stamped a wonderful vintage truck image from my Mark's Finest Papers - Big Boy Toys stamp set with Versafine ink in Olympia Green and heat embossed it with clear powder.  I die cut the image with my brand new My Favorite Things Die-namics - Stitched Square STAX die set.  (THANKS for the huge prize, MFT!!!)  

I also used my Mark's Finest Papers - Background Fun stamp set for the fun sentiment and crackle background stamping over the paler blue panel, which I scrounged from my scrap bag along with the royal blue paper.  

Making some extra masculine birthday cards is on my list for January, so I am glad to get a good start with this one.  Hope you enjoyed it.  Thanks for taking the time to comment!  I have two more cards (at least) to post for this acrylic block challenge......so, see you sooooooooooooooon!!!  

<3
Janis

Thank you for the honor of entering this card in the following challenges:
1.  Mark's Finest Papers Speedy Fox and Friends technique challenge - Acrylic Block Stamping
2.  The Male Room Challenge #26 - Anything Goes
3.  Sisterhood of Snarky Stampers Challenge #50 - O is for Old
4.  Craft Stamper TIMI January Challenge - Take a Stamp
5.  House of Cards January Challenge - Embossing or Color Challenge
6.  Shopping Our Stash Challenge #234 - Something New
7.  Dragonfly Journeys Challenge #39 - You Crack Me Up :)
8.  Pixie's Snippets Playground Week #211 - Use snippets
9. One Crazy Stamper January Challenge - Anything Goes 

Hello, Friend - Stencil techniques


Hi, Friends.......

I'm here to share a bright, cheery card for the Waffle Flower stenciling technique challenge.  


I love winter days when the sky is blue and minute gleaming snowflakes called diamond dust are wafting down from a seemingly blue sky.  Everything looks iridescent and there are very faint hues of pink and blue in the sky.  That's the inspiration for this card.


I started with a patterned paper covered card base. I grabbed my Simon Says Stamp - Falling Snow Stencil and spread some of my new Faber-Castell Glass Bead Glitter Gel through the small holes. It is subtle with this sparing use, but reminds me of the sparkling diamond dust. After the Glitter Gel was dry, I stenciled over the background again using a doily from my stash and some Distress Ink in Spun Sugar.

My sentiment is from the Waffle Flower - Flower Circles stamp set. I stamped it on a scrap of white cardstock with Versafine ink in Smokey Gray and heat embossed it with clear powder. I stenciled over the top of it with the same doily and DI, too. I used dark pink DCWV scraps for matting and rounded the corners of everything with my WRMK Crop-a-Dile Corner Chomper.

As I was putting my card elements together, I felt like it needed something else.  On a whim, I cut a wedge of the (now pink) doily that I used as my stencil and placed it in the corner for a fanciful bit of sunshine.  I love it!!  :)  A bright gingham ribbon and a few little snowflakes scattered here and there just for fun finished it all off.

Thanks for stopping by today.  And thank you so much for all the amazing comments you gave me on my Joyeux Noel card.  I am delighted and encouraged with your response!!!

Hope your week is awesome!!!

<3
Janis

Thank you for the honor of entering this card in the following challenges:
1. Waffle Flower January Technique Challenge - Stencil
2. Design Memory Craft - January 2016 Take the Challenge with Mou - Snow
3. 
Happy Little Stampers January Mixed Media Challenge - Stencil

Tuesday, January 12, 2016

Joyeux Noel - Mixed Media

Awww....I miss watching kittens playing in the snow.
It's almost as much fun as watching a 5-yr old!


Hi, Friends......

All the enticing challenges with snowy themes have put me in the mood for playing with my snowy sorts of stash items.  The lovely snow outside helps, too.  :)   


Grandpa helping Little Peach onto her snow disk on top of her snowy gravel pile.


Wheeeeeeeeeeeeeeeeeeeeeee!!!!!!!

Most amazing man....ever!


Good Grandpa   ------------------>>>>>

  <3  <3  <3 


Back in the house, I pulled out all my snowy double embossed and molten technique backgrounds that have sat in cold storage since last winter.  :)


I chose a dazzling one where I used my favorite way of embossing:  my molten technique.  For those of you who are unfamiliar with this technique, I will describe it in a nutshell.  You first dry emboss cardstock, then Versamark over it and heat emboss with layers of one or more colors of powder.  I like to use more than one to bring out the texture of the embossing.  As you heat emboss layer over layer, you achieve the delicious molten look that I totally adore.  This burns through tons of embossing powder!!!  If you have questions, please ask in your comments.  


On this particular one, I previously had inked my Darice - Snowflakes and Flourishes folder with Distress Ink in Salty Ocean before dry embossing the cardstock.  Then I Versamarked it, leaving a few parts bare so the blue would show through.  Then I heat embossed with several layers of silver powder to get the molten look.  

With inks and embossing powders this background was already sort of mixed media (maybe?), but I have been just dying to try my new Faber-Castell Glass Bead Glitter Gel. I spread it around the entire edge of the background card and let it begin drying. After an hour or so, I could see that I was going to be totally in love with this wonderfully sparkly product, but I didn't have it as thick as I wanted. So I dispensed with my craft medium spreader and globbed it around very thickly with my finger and let it dry. (I'm sure my techniques probably make the amazing artists at Design Memory Craft roll their eyes!! lol...) Anyway....I LOVE the result.

I cut the piece twice diagonally and put it on black cardstock. Love how there are bits of the medium that have dried over the edge of the panel, giving added texture. On one of the panels, I tied some crinkly hand-dyed seam ribbon I won from Karen F. over at her weekly challenge at Little Scrap Pieces. (Thanks, Karen!!!) Isn't it perfect with this?

Do you like my sparkly snowflake? This is a brand-new piece I got from Southern Ridge Trading Co. Did you know they have a wonderful monthly challenge? Check it out and you can win some fabulous chipboard shapes, too! (THANKS, SRTC!!!) It started out as a plain brown chippie. With the magic of gesso, Gelatos, and more Faber-Castell Glass Bead Glitter Gel, it turned into what you see. Soooooooooo much fun!!!

I added an anonymous Christmas sentiment from my stash that I stamped on a scrap of cardstock with Versafine Onyx Black ink and heat embossed with clear powder. I mounted everything on a glittery silver premade card base. Oh, swoon...... This is my absolute-est favorite-est thing I've made in a while!!! The shine, sparkle, and glittery-ness are absolutely amazing. Nothing like going stark, raving mad about my own card, right? Ha. (Sorry....sorta...)

I hope you have enjoyed this card.  It was a total joy to make.  I very much appreciate your visits and your lovely comments!!!

<3 
Janis

Thank you for the honor of entering this card in the following challenges:
1. Design Memory Craft - January 2016 Take the Challenge with Mou - Snow
2. Southern Ridge Trading Co. January Challenge - Anything Winter (I used SRTC chipboard snowflake!)
3. DRS Designs Challenge #208 - Weather Outside
4. Craft Rocket Challenge #6 - Happy Anything (Happy Christmas!!)
5. Pixie's Snippets Playground Week #211 - Use snippets
6. Amusing Challenges - Let it Snow
7. Creative Artiste Challenge #10 - Mixed Media Anything Goes with Twist: Use Chipboard
8. Stamps and Stencils - Mixed Media Oh, So Blue
9. Anything But Cute Challenge - Mixed Media Ring out the Old, Bring in the New (I used two new products: F-C Glass Bead Glitter Gel and the SRTC chipboard snowflake)
10. Let's Craft and Create Challenge #109 - Layer it Up (I have layers of paper AND layers of embossing powder!)

Sunday, January 10, 2016

Cat Sympathy Card - Simple Stories


Hi, Friends........

I'm here with a pet sympathy card I made for some close friends who tragically lost a dear kitty this week.   Sparkle was so much a member of their family....a lovely cat with an incredibly gorgeous fluffy gray coat with subtle swirls of color.  My own family will miss this beautiful animal, too.

I used elements from one of my favorite cat collections: Simple Stories Cat Sn@p Collection.  Cat Sn@p! 4x6 Cards, Cat Sn@p! Insta-Squares & Pieces, and Cat Sn@p! Stickers. My sentiment is from the Paper Smooches - Feline Friends stamp set.  I stamped it with Versafine ink in Onyx Black on a scrap of white cardstock.  I used DCWV scraps for matting.
Front of card
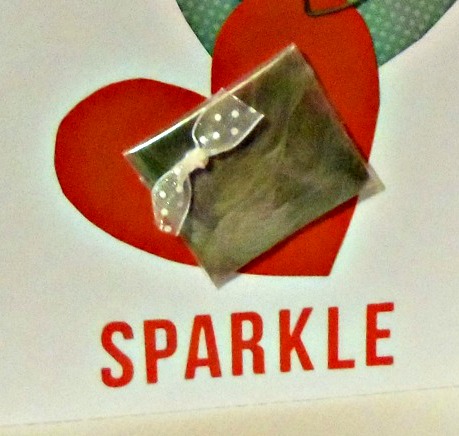
 On the inside of the card I used scraps for cutting out hearts and arranged them with a pawprint I had made from little Sparkle before she died and a tiny bag of her fur my hubby had collected.

Inside of card

Sweet Sparkle was such a fluffy thing that when I made her pawprint, I didn't get a very clear impression.  She was very patient as I made three quick prints with Distress Ink - Evergreen Bough.  I chose DI so I could easily and gently wash it off her furry little paw afterwards.  I misted the print with hairspray to set it and make it water-resistant before putting it on the card.  You can see evidence of her fluffy little "snowshoes" showing between her toe pads.  


Do you like the little cat clip? It's from Maya Road - Vintage Cat's Meow Clips. LOVE!!! 

I tied a tiny scrap of ribbon in a knot for a sweet bow on the bag of Sparkle's fur.

Thank you for taking this tour through my card.  Hope it has given you ideas on making special pet cards or journal pages.  The good part is that this doesn't have to wait until a dear pet is ill or injured.  You can make memory pages of your healthy active pets right now! 

Thanks for stopping by and for leaving your awesome comments!

<3
Janis

Thank you for the honor of entering this card in the following challenges:
1. SUYP Cats Only Challenge #2 - Anything Goes Cats
2. Pixie's Snippets Playground Week #211 - Use snippets
3. The Paper Girls Challenge #95 - Home/Family (Pets are family, too!)
4. One Crazy Stamper January Challenge - Anything Goes
5. MAWTT Challenge #11 - Spots and Dots